Quick and easy charm pack table runner

(or: Why you should totally buy that kitschy seasonal charm pack)
I will admit that I had the Sweater Weather charm pack in my cart before I actually knew what I was doing with it. But considering that Thanksgiving was fast approaching, a table runner seemed like a sensible choice. I also wanted a small project I could start and finish quickly since I had a few larger projects on the go, and needed the satisfaction of seeing something actually *done*.
I searched around Pinterest a bit for table runner patterns, but in the end, because the fabric patterns in the pack were themselves quite busy, and I wanted to keep things as simple as possible, I ended up just doing a variation on simple patchwork.
This pattern requires one pack of 5” charm squares (you’ll use 39 squares), one yard of backing fabric (cut into two 18” x WOF pieces and sewn together to make an 18 x (2xWOF) strip), and about ¼ yard of fabric for binding (cut into 2 ¼ “ x WOF strips).
The first step is to lay out your squares in the desired pattern. You’ll end up cutting 9 of the squares in half diagonally to fill in the edges. To figure out which squares to cut, you can lay out one side of the runner (before cutting the squares), to get a sense of how the colours work:
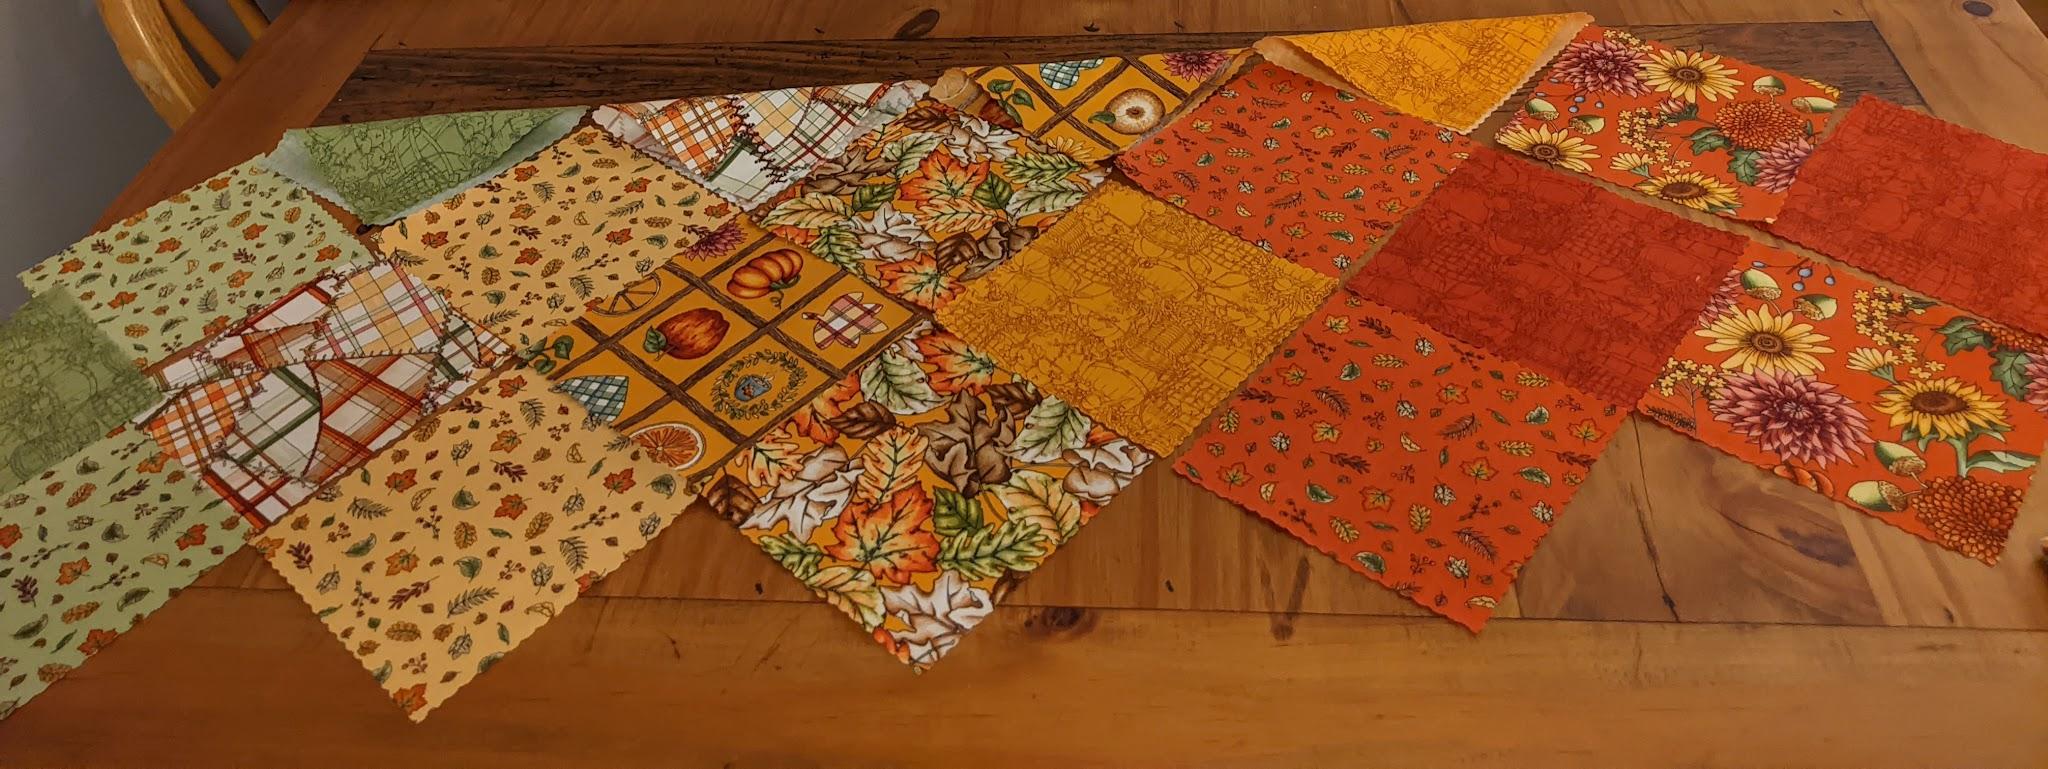
Once you’ve selected 9 squares for the edge pieces, cut them diagonally through the center. Then you can lay out the full runner. You can either randomize the squares, or make your layout more symmetric. Because my charm pack had an appealing rainbow fade going on, I erred on the symmetric side so I could get a gradient effect in the runner.

Once you have a layout you like, you’ll begin sewing the squares into strips. Because of the diagonal nature of the patchwork, I was extra diligent about numbering my strip sets and stacking them in the same order to ensure that I sewed the squares together in the correct order. In particular, you’ll want to make sure that the triangles on the ends are oriented in the correct direction, so that the edges will line up when you sew the strips together.
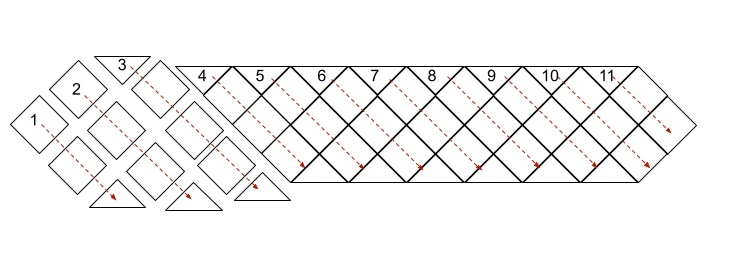
After you’ve sewn the pieces into strips, press the seams in alternating directions (e.g. press all seams on strip #1 to the left, all seams on strip #2 to the right, etc.) so they will nest nicely when you sew the strips together.
Sewing the strips is fairly simple, but because they are diagonal to the edges, the seams will be offset by one (see diagram below). The exceptions to this are strips 1 and 2, where you will align the top edge, and strips 10 & 11, where you will align the bottom edge, to make the pointed ends of the runner. If you get confused while assembling the strips (I did a few times), you can always lay out the previous strip and use it as a reference for how to align the ones you’re currently assembling (this is another reason why numbering the strip sets is useful).

At this point, you’ve assembled the entire runner, and are ready to baste and quilt. I spray-basted mine, and opted for a super simple quilting pattern: a 1.5” grid (quilted with a walking foot) along the same orientation as the seams). Depending on your fabric, you might want to do something more elaborate, though. I also used a red thread, to match the binding.
Speaking of binding: binding this quilt is fairly straight-forward. You’ll want to trim the excess backing and batting after quilting, and possibly a little bit of fabric off the long edges to make sure all the seams line up. From there, you can bind as desired (I used 2 ¼ “ strips, pressed in half, and machine bound from back to front).
The only fiddly part is mitering the 135˚ corners (along the long edges), for which I found this blog post very helpful (although I did not hand-stitch my corners, I just machine-bound them as usual, but folded the fabric as directed in the post).
I really like that this is a relatively simple pattern that can be completed in a weekend, and results in a functional table runner (although to use it in place of a trivet for very hot dishes, you should probably use Insul-Bright, or other insulated batting in place of regular batting). I plan on using it as an excuse to buy more cute seasonal charm packs making more of these for gifts and other holidays in future.